I have noticed that one of the most common search terms I see is "how to build an outdoor fireplace?" Well, you have found the answers. The good news is building an outdoor fireplace is simpler and safer than building an indoor fireplace. You don't need to put a hole in your house, install a damper, and if you have a chimney fire, there is no risk of your house burning down. That being said, you should always consult a professional before you attempt to build a fireplace in your backyard (or any yard).
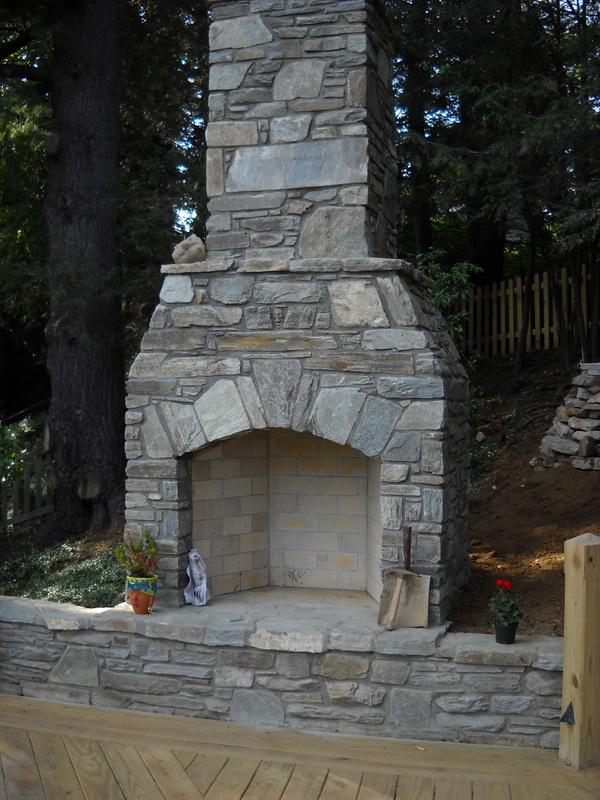
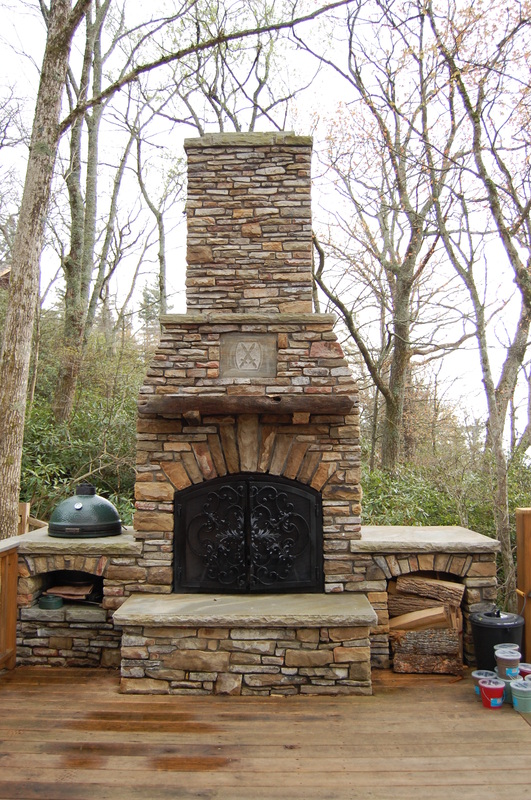
This outdoor fireplace in Boone, NC makes this deck feel more like an outdoor living room.
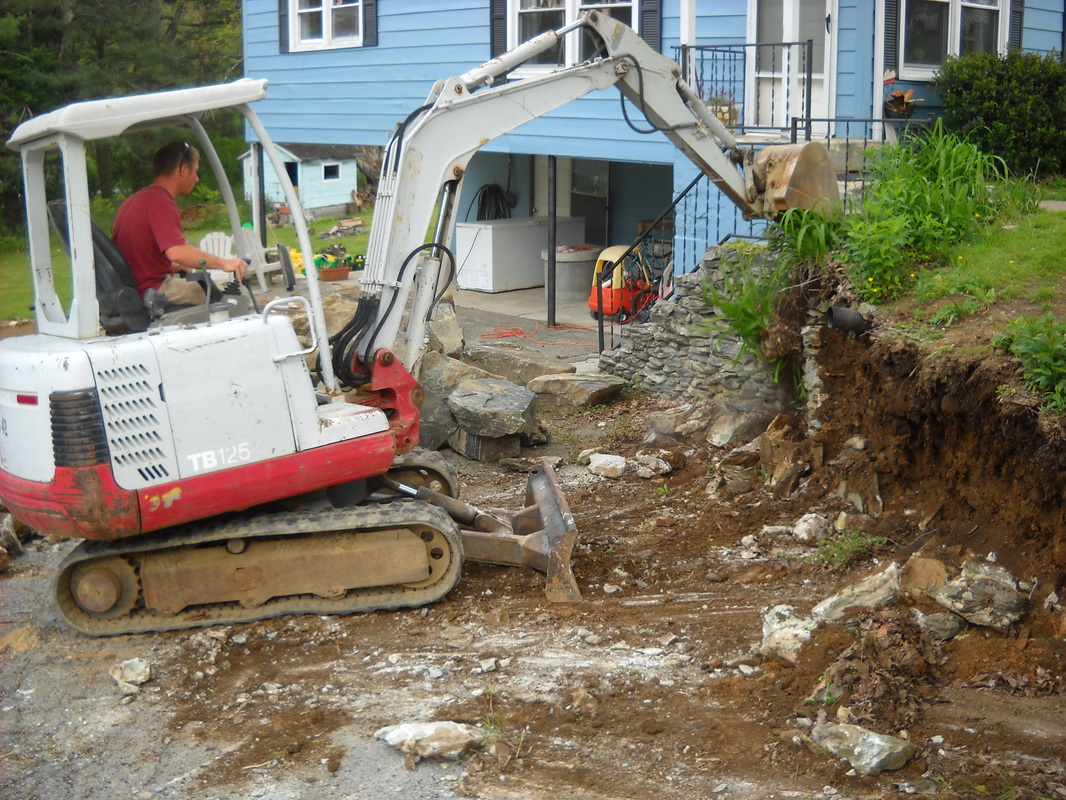
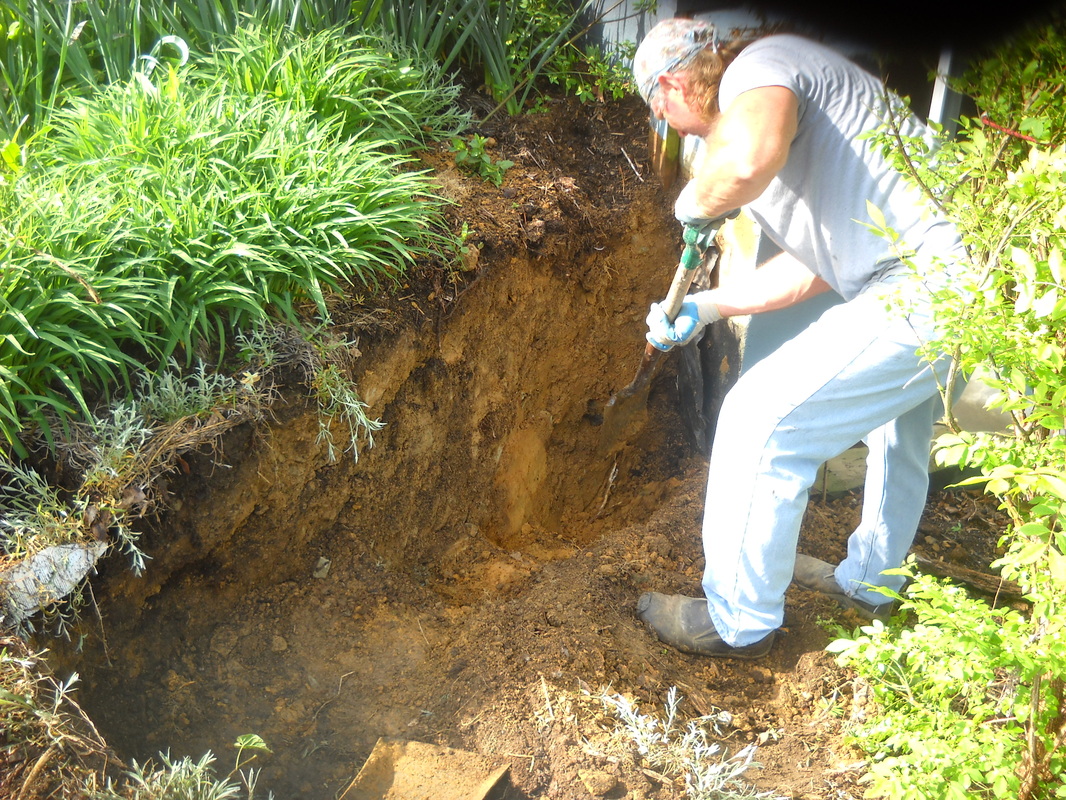
STEP 1: EXCAVATE AND POUR FOOTINGS.
Once you have decided where to put your outdoor fireplace, the first step is to excavate (DIG) for your footing. While this is not fun, it is very important that you construct a solid footing because your fireplace will be REALLY HEAVY.
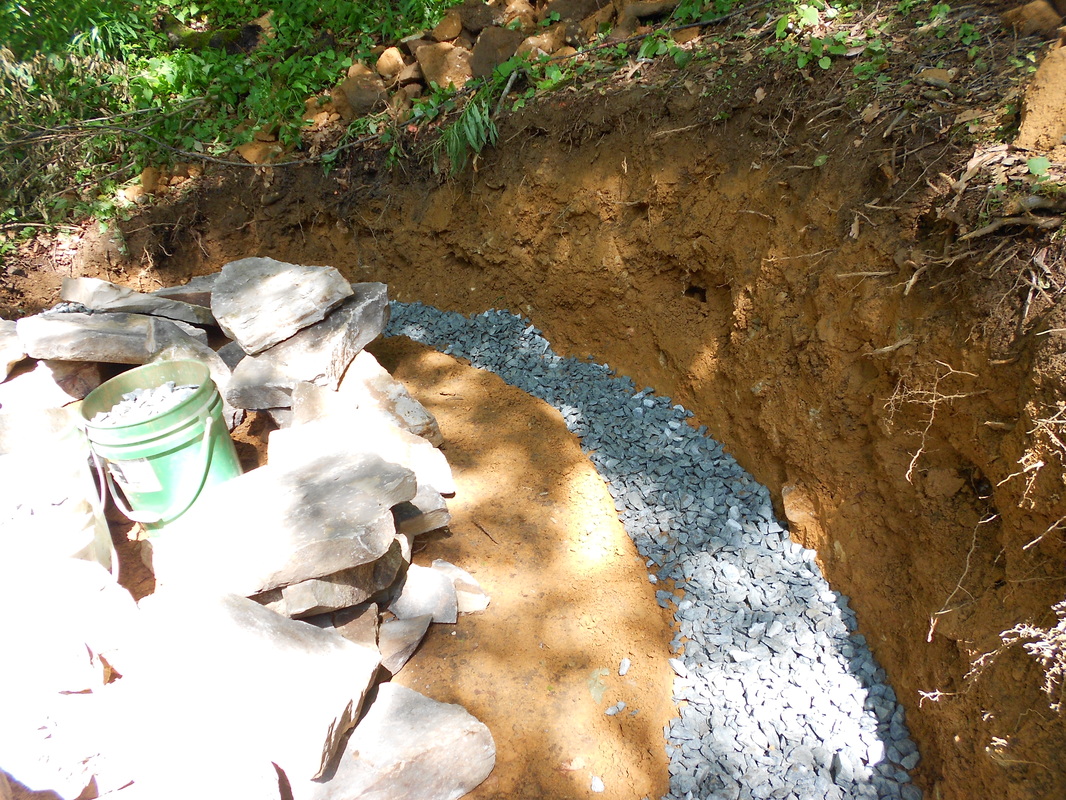
I recommend placing rebar at intervals of 1-2' to increase the strength of your footing, then pouring concrete 8" thick. Consult your local building codes for the appropriate depth of your footing.
Once you have decided where to put your outdoor fireplace, the first step is to excavate (DIG) for your footing. While this is not fun, it is very important that you construct a solid footing because your fireplace will be REALLY HEAVY.
I recommend placing rebar at intervals of 1-2' to increase the strength of your footing, then pouring concrete 8" thick. Consult your local building codes for the appropriate depth of your footing.
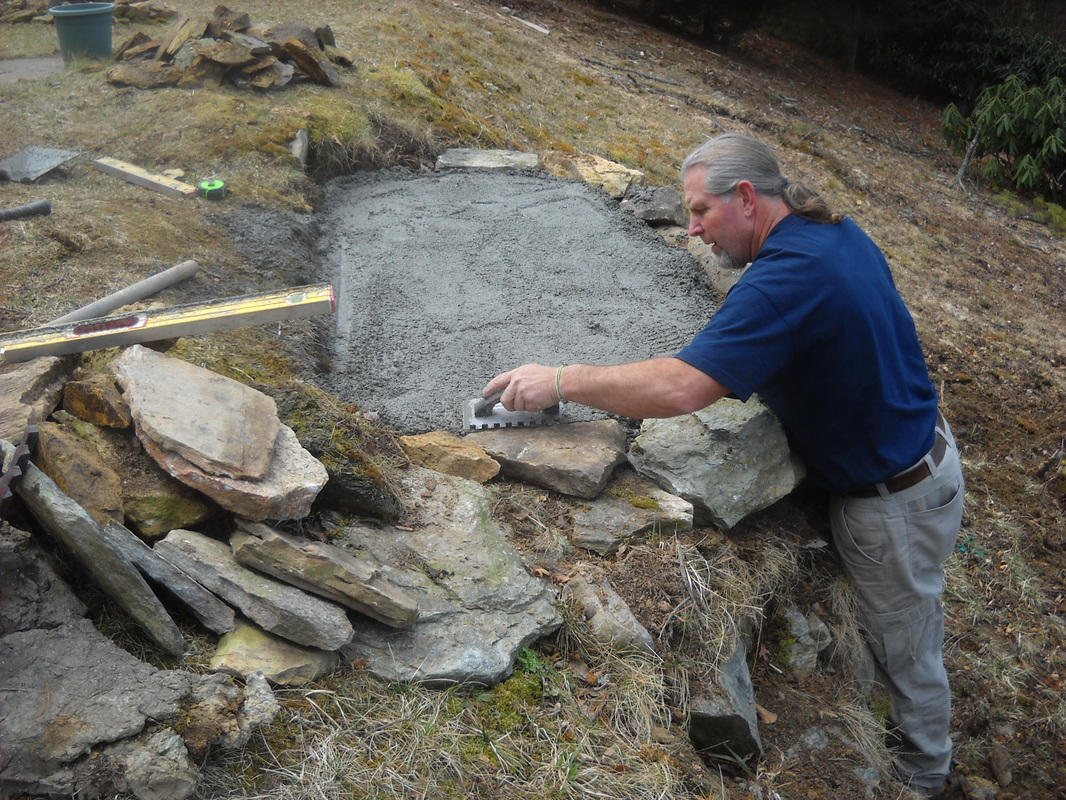
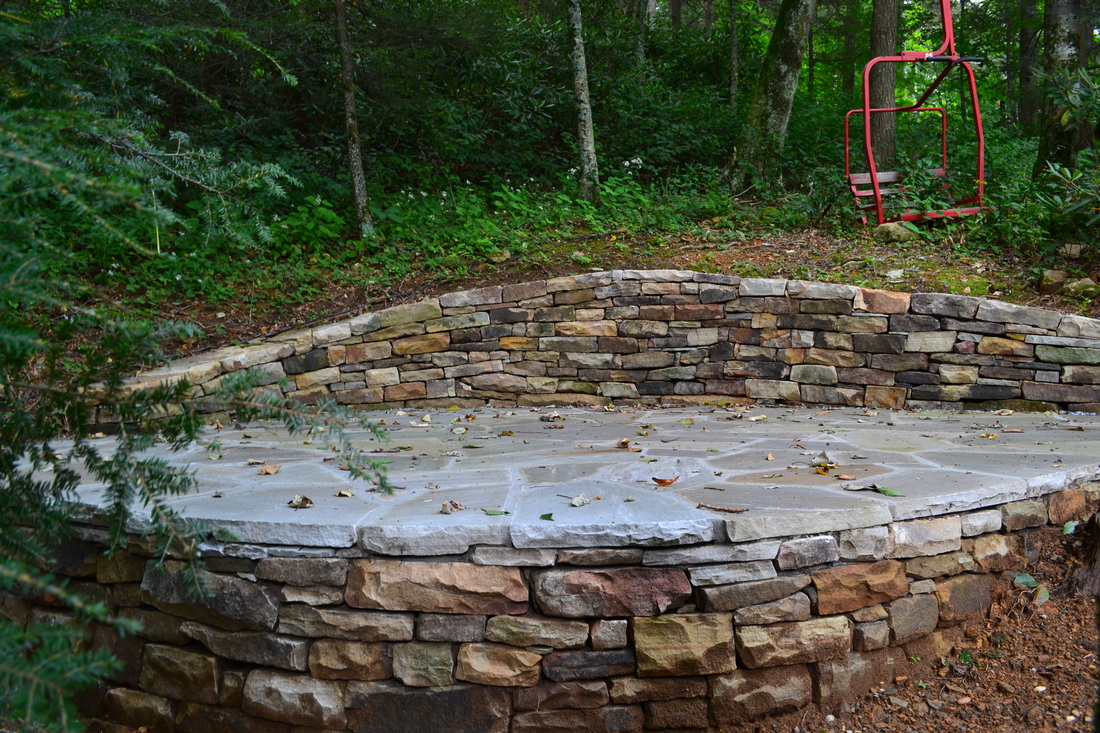
We were lucky enough to pour this footing on top of a rock outcrop for a true stable footing.
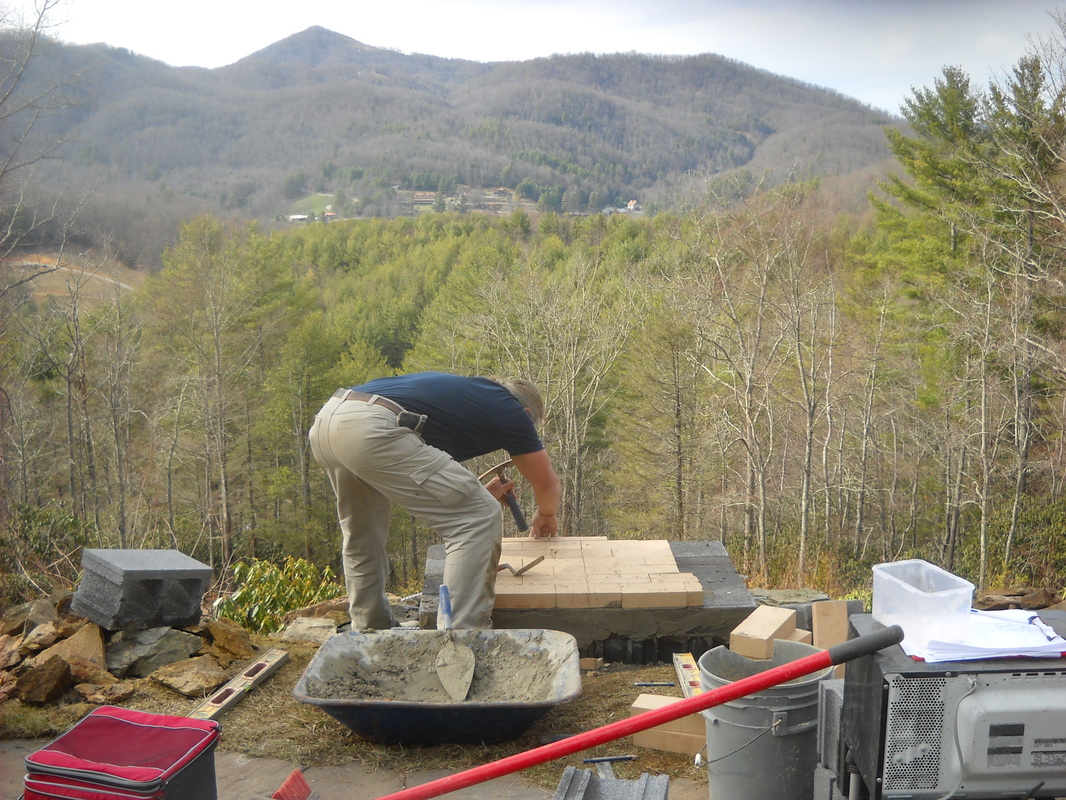
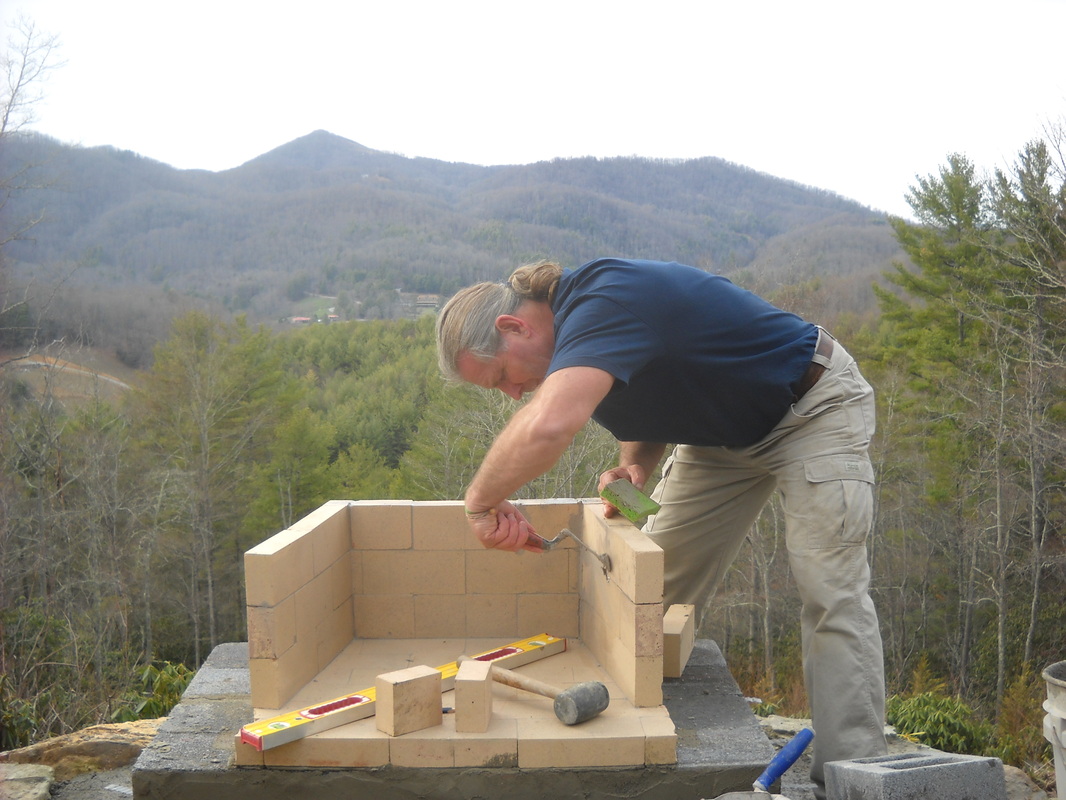
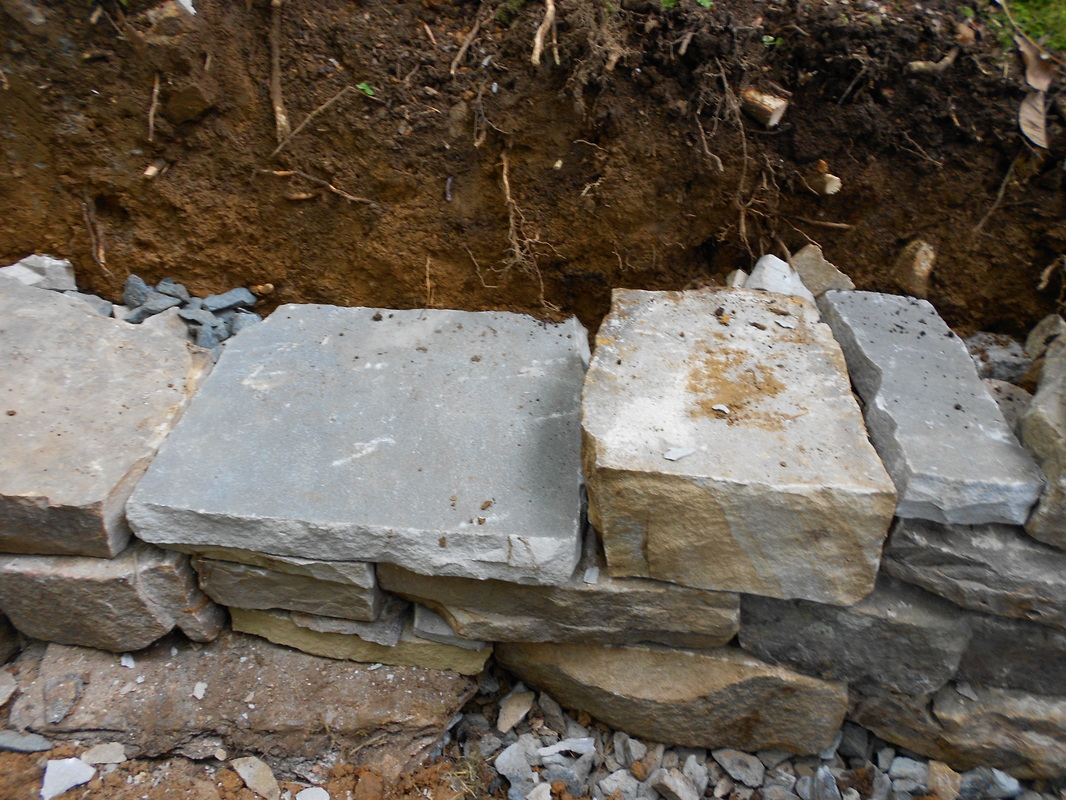
STEP 2: BUILD A BASE AND FIREBOX
Once your concrete footing has cured for 24 hrs or more, you will need to build a level base on which to construct your firebox. I suggest 4" solid block for this purpose. Next you will build your firebox to whatever size you have chosen using firebrick and refractory cement from your local masonry supply. It is important that you keep all surfaces of your firebox level, plumb and square for it to look correct..
Once your concrete footing has cured for 24 hrs or more, you will need to build a level base on which to construct your firebox. I suggest 4" solid block for this purpose. Next you will build your firebox to whatever size you have chosen using firebrick and refractory cement from your local masonry supply. It is important that you keep all surfaces of your firebox level, plumb and square for it to look correct..
STEP 3: BUILD THE THROAT.
Once you have completed the firebox and allowed the mortar to set, it is time to set your block around it and build the "throat" (where the firebox tapers in to the size of your flue liners). This involves the difficult technique of "corbeling" (overhanging the brick so they step out at each course).
Once you have completed the firebox and allowed the mortar to set, it is time to set your block around it and build the "throat" (where the firebox tapers in to the size of your flue liners). This involves the difficult technique of "corbeling" (overhanging the brick so they step out at each course).
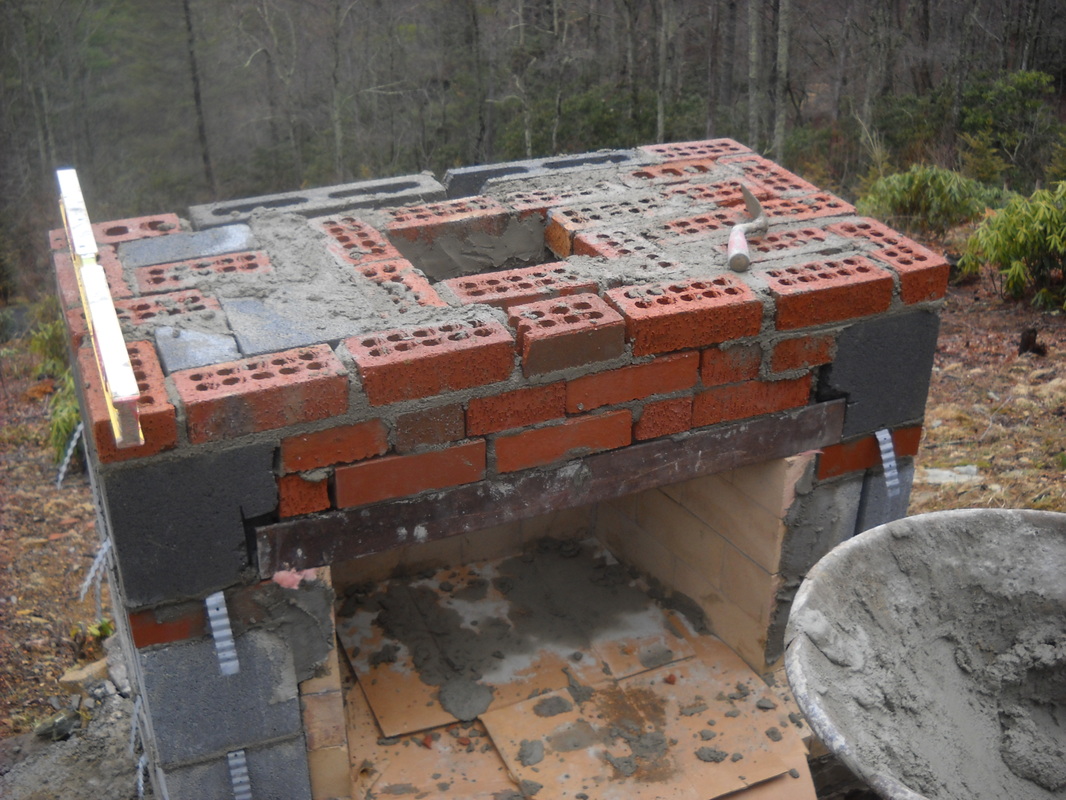
As you can tell this is really MESSY. So if are a a neat freak, I wouldn't try this. I wouldn't even WATCH someone try this.
But here you can see all the components are in place to build the flue and set stone. You will want to use a steel angle iron to carry the weight of the masonry over the firebox. Also, place galvanized wall ties in the joints between the block because its way easier than drilling holes and attaching them later. As you step each row of brick in over the firebox, build masonry above it to counter the weight of the overhang. Repeat until you have reduced the opening to the size of your flue liner.
But here you can see all the components are in place to build the flue and set stone. You will want to use a steel angle iron to carry the weight of the masonry over the firebox. Also, place galvanized wall ties in the joints between the block because its way easier than drilling holes and attaching them later. As you step each row of brick in over the firebox, build masonry above it to counter the weight of the overhang. Repeat until you have reduced the opening to the size of your flue liner.
STEP 4: BUILD THE FLUE
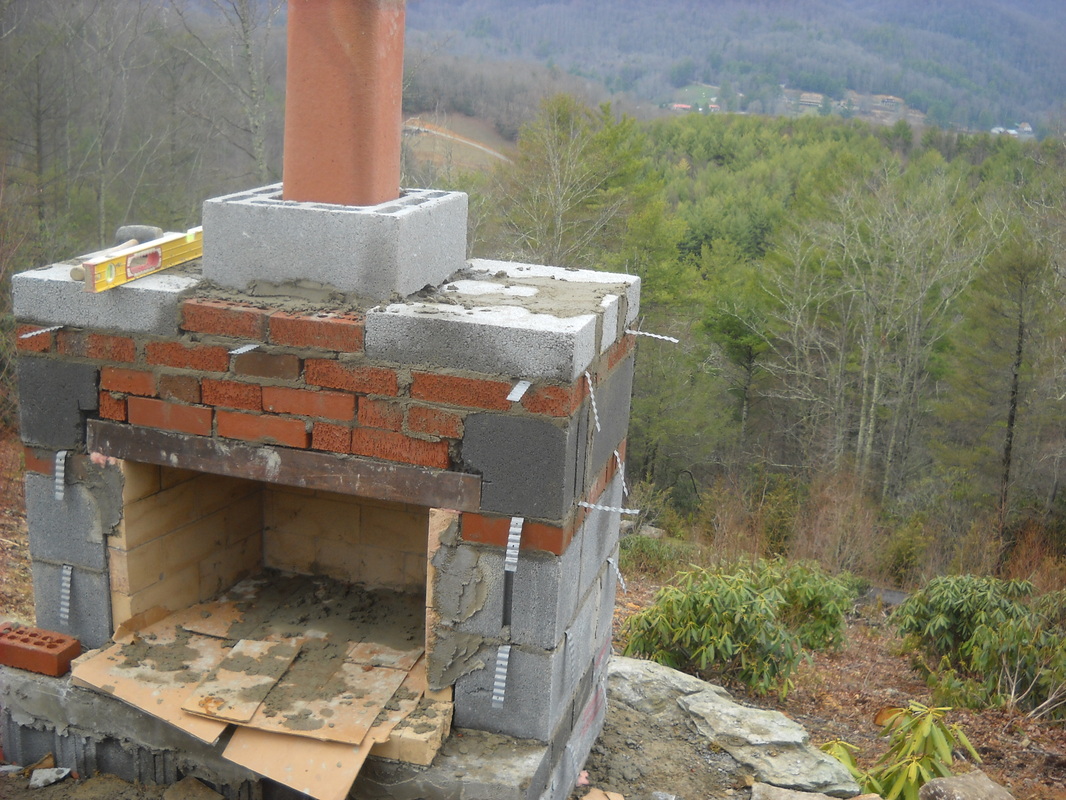
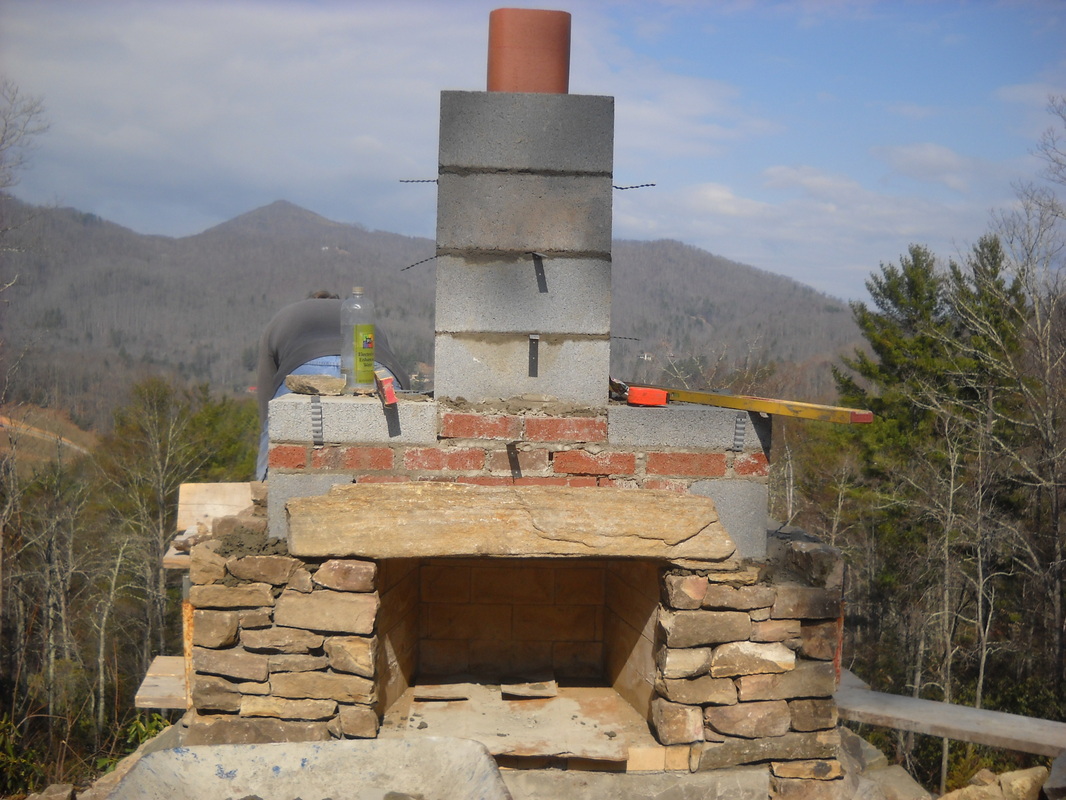
This is the easy part. Set your first liner in a bed of mortar, then slide a flue block over it. Repeat until you reach the desired height. And keep it plumb.
This is the easy part. Set your first liner in a bed of mortar, then slide a flue block over it. Repeat until you reach the desired height. And keep it plumb.
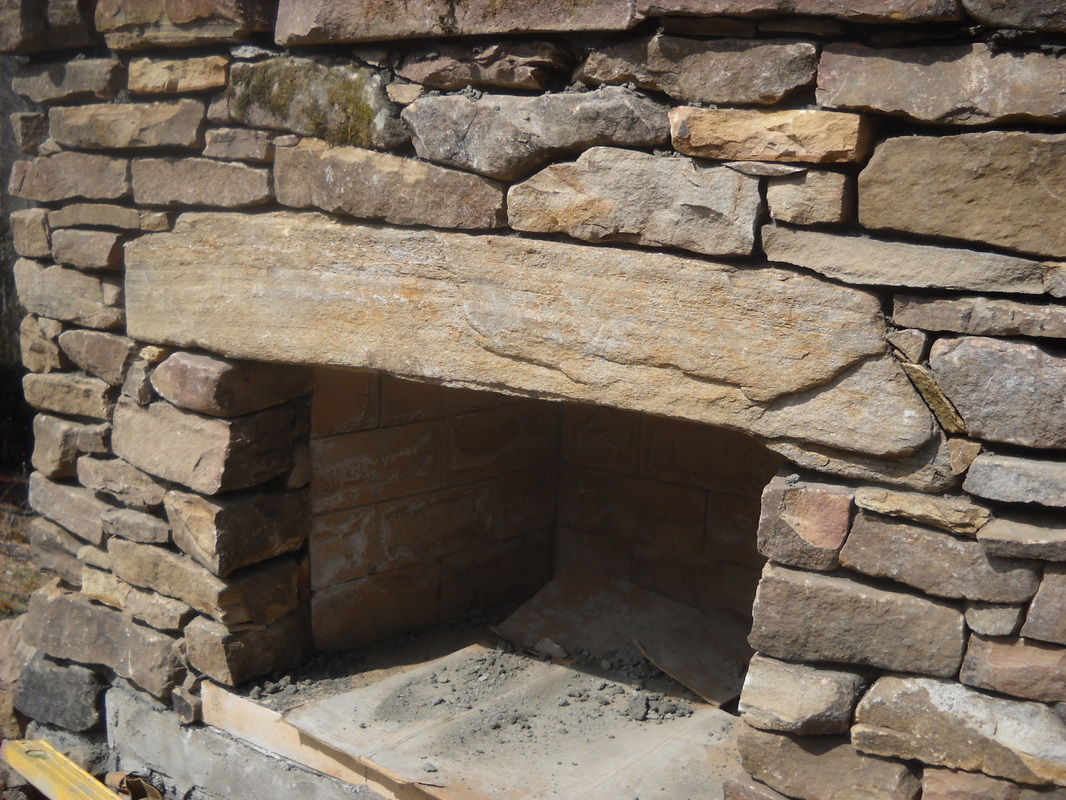
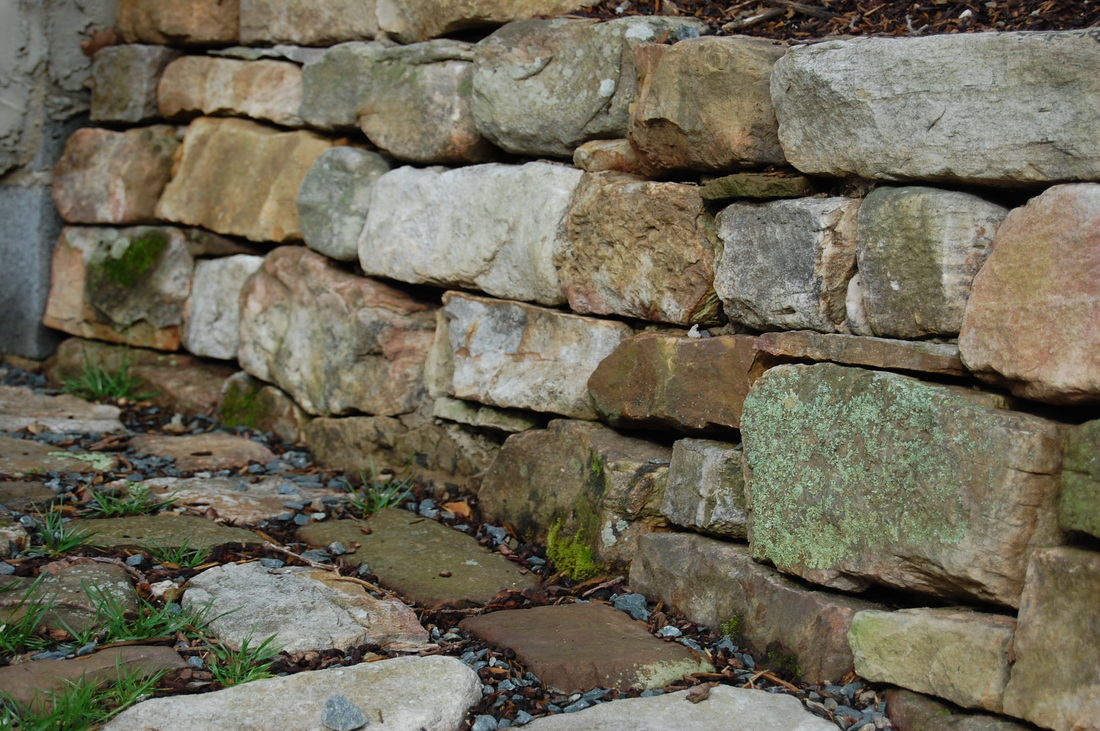
STEP 5: STONEWORK.
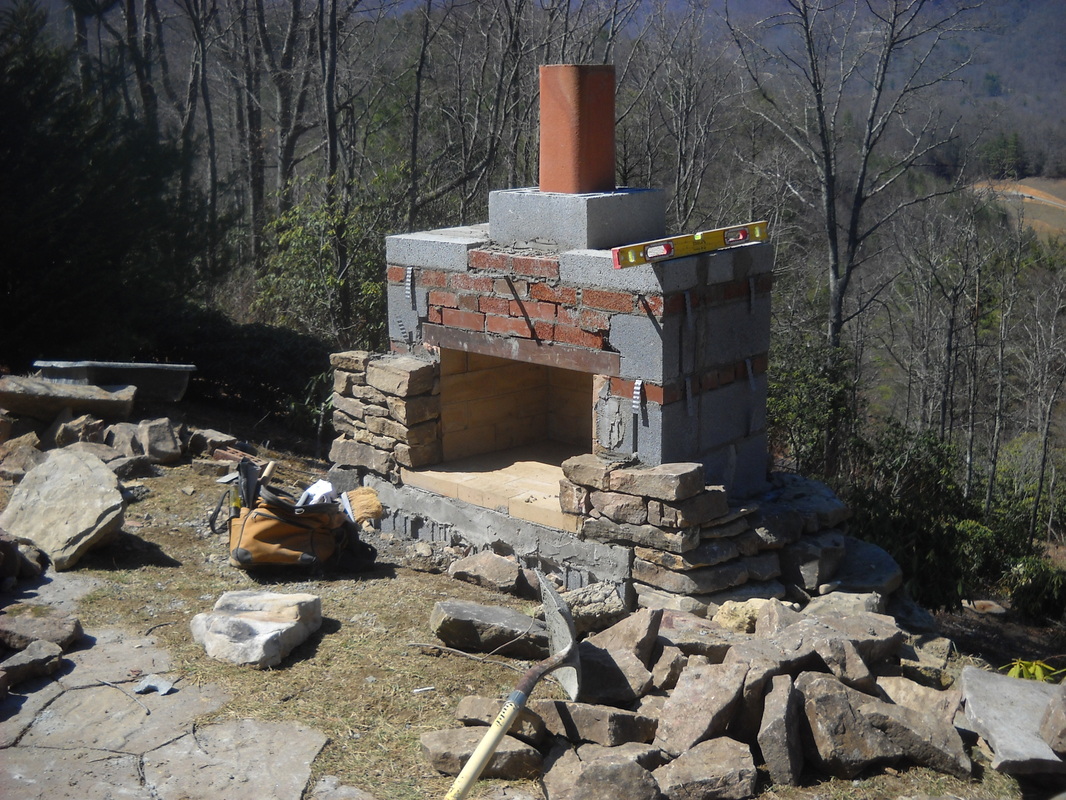
This is the fun part. By this point you have chosen your stone and the style of stonework. I recommend building your stone veneer 6-8" thick to accommodate a variety of shapes and sizes. Set each stone in a bed of mortar, and fill the spaces between and behind the stones with mortar. Once the mortar dries (1-4 hrs) rake it from the joints and brush it smooth. Follow the principles of 1 stone over 2 and 2 stones over 1 for best results. Look for a long stone to be a "lintel" over the firebox, or learn to build an arch (future post). Or you can put a piece of steel to support the stone.
This is the fun part. By this point you have chosen your stone and the style of stonework. I recommend building your stone veneer 6-8" thick to accommodate a variety of shapes and sizes. Set each stone in a bed of mortar, and fill the spaces between and behind the stones with mortar. Once the mortar dries (1-4 hrs) rake it from the joints and brush it smooth. Follow the principles of 1 stone over 2 and 2 stones over 1 for best results. Look for a long stone to be a "lintel" over the firebox, or learn to build an arch (future post). Or you can put a piece of steel to support the stone.
I hope you have enjoyed this lesson on building an outdoor fireplace, and contact me if you have any questions, or to find a professional near you, visit http://stonefoundation.org/membersusa.html.


 RSS Feed