Living Stone Masonry
  • Home
  • Workshop
  • Gallery
    • Before/After
  • Blog
  • Contact
  • Videos
  • Mission
  • Testimonials
  • About Me
  • Instructional
    • Glossary
  • Links

Building a drystone retaining wall.

4/27/2011

1 Comment

 
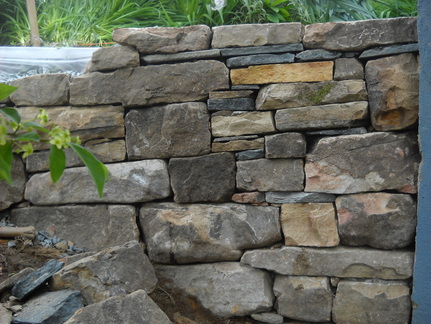
Today we worked on the drystone retaining wall in Daisy Ridge.  Walls like this are different, and much more labor and stone intensive, than a mortared or veneer stone wall.  The reason is that the wall has to be structural, as well as look good, so the stones have to tie back deeper into the backfill and be fitted much more carefully.
Picture
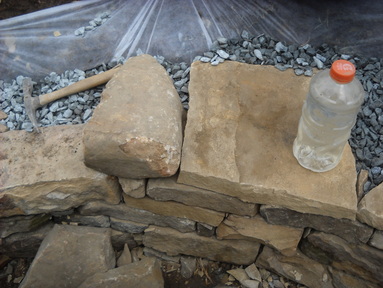
Notice how much more stone is extending back into the wall than what you see on the face of the wall. These are called "tie stones" and they are critical to building a strong drystone retaining wall.
Picture
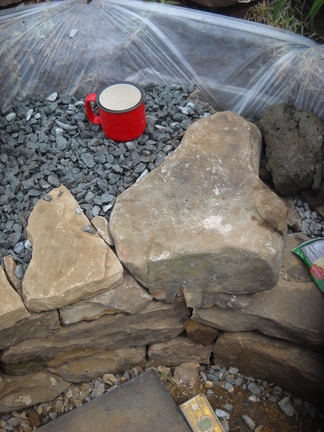
Another "tie stone". Every third rock at least should be a tie stone. We use rubble, rock chips, and 3/4" washed gravel for the back fill, which allows water to pass freely through the structure. The white fabric prevents soil from infiltrating the gravel and inhibiting drainage.
Picture
1 Comment
Retaining Walls Brisbane link
7/12/2012 04:52:59 pm

This is awesome content. I think I actually understand the concepts you are trying to convey. I agree on several of the points you’ve listed. You make sense to me.

Reply


Leave a Reply.

    Author

    Franklin Smith, owner Living Stone Masonry and general stone enthusiast

    Archives

    October 2018
    April 2018
    June 2016
    March 2016
    October 2015
    September 2015
    May 2015
    January 2015
    December 2014
    October 2014
    July 2014
    February 2014
    February 2013
    January 2013
    November 2012
    September 2012
    August 2012
    July 2012
    June 2012
    May 2012
    April 2012
    March 2012
    February 2012
    December 2011
    November 2011
    October 2011
    September 2011
    August 2011
    June 2011
    May 2011
    April 2011
    March 2011
    February 2011
    January 2011

    Categories

    All

    RSS Feed

  • Home
  • Workshop
  • Gallery
    • Before/After
  • Blog
  • Contact
  • Videos
  • Mission
  • Testimonials
  • About Me
  • Instructional
    • Glossary
  • Links